Wednesday, December 26, 2012

Christmas time was here!

I hope you all had a wonderful Christmas celebration! Ours was (as always) an exhausting but wonderful whirlwind of families, gifts, church services, and food. Lots and lots of food! I have zero will power when it comes to peanut butter balls, or peppermint bark, or brownies, or gingerbread cookies you get the picture! Those healthy new year's resolutions are just around the corner...

Anyway, here are a few of my favorite shots from Christmas Day.


***

Here is a simple egg casserole that we made for Christmas morning. I prepped most of the ingredients the night before, so Matt could just mix everything together (while I slept!) and pop it in the oven. It was hearty, delicious, and just 6 servings (a nice alternative to the giant recipes one generally finds).

Christmas Breakfast Casserole

1/4 cup ham, chopped
1/2 yellow onion, chopped
6 eggs, beaten
2-3 cups potatoes, shredded or chopped
1/2 cup shredded cheese
Thyme, 1/4 tsp dried
Salt & Pepper, to taste

Preheat your oven to 350° F. Combine all of the ingredients in a large bowl and mix well. Pour into a greased pie pan and bake 40-45 minutes or until set.


Tuesday, December 18, 2012

Make: Tulip Skirt


I think it's time to take a break from all of the holiday crafts and share this fun "Tulip Skirt" with you!

I don't want to get into the habit of recreating tutorials, like this one from Cotton & Curls, but I actually had a difficult time following her written instructions. So I re-wrote the directions for my own sake and have decided to share this more detailed version with you.

Funny story: Although I just made this skirt a few weeks ago, I feel like it counts as vintage! You see, over the summer my grandmother (or rather, Mimi, as she is known in my family) found a bag of untouched fabric that had been burried in her closet for years. It had been so long that she couldn't remember what she had intended to do with it. While investigating, we found a faded receipt stating April 1993! That's a whopping nineteen years! She gave me the fabric with the stipulation that I make something nice with it. I think I was successful.

Supplies:
1.5 yards of flowy fabric
Thread
Buttons (2-3)

1. Cut the piece of fabric in an elongated half-oval. The top line of the shape should be your waist measurement x 2, then add another 12-16 inches (since it will wrap around your waist). The larger this measurement, the more gathered the final product will be. I used another skirt to determine the length.


2. Hem the curved edge.
3. Gather the top of the skirt, enough that it equals your waist measurement + 12-16”. If you don't know how to gather fabric, here is a great tutorial.


4. Bias Tape: decide how wide you want the waistband, then multiply that number by 2, and add an extra inch. Cut a strip of fabric (length = your waist measurement + 12-16") with that final width. Hem the short edges. Fold it in half lengthwise and iron. Then fold down both of the raw edges 1/4 inch and iron—DO NOT HEM.

**See Note**

5. Pin and sew one of the folded-under edges to the inside of the skirt (along the top) and sew a straight stitch.

6. Fold the bias tape over the waistband to the outside of the skirt and pin down. Sew a straight stitch along the edge of the waistband.


7. Add 2 buttons to the front of one end, 6" to 9" apart (depending on how much you want the skirt to cross over).

8. Now make 2 buttonholes the same width across on the other side. You can make extra holes to adjust waist size.

 **Note: If you want one of the buttons to be hidden (like mine), sew a single buttonhole on just one side of the waistband before step 5.


I felt oh-so-awkward taking these photos.


Monday, December 10, 2012

Make: $2 Centerpiece


This year's Christmas Centerpiece is brought to you by the dollar store. Oh, how I love the dollar store! These warm feelings go all the way back to my childhood. In an effort to teach my sister and me the joy of giving, my mom would take us to the dollar store to buy Christmas or birthday presents for the family. We roamed the aisles, painstakingly deciding between tchotchkes. To this day, my dad still has little ceramic kittens and puppies displayed in his office. I imagine his co-workers are surprised by his apparently juvenile taste in office décor. That's the love of a father for ya...

Where were we? Oh right, my centerpiece. I must admit that I completely stole this concept from my friend Mary, who originally got the idea from Decor Chick. It is so easy!


Simply glue a glass candlestick holder to a (not-too-tall) glass vase. That's it. I spent more time  getting the superglue off my fingers.

I guarantee that you will find these two objects at your local dollar store. Mine were even cheaper because I have approximately 1 million vases leftover from my wedding. While you are at the store, why not look for filler to put in the vases? I made three apothecary jars and filled each with different holiday things: peppermints, colorful ribbon, and ornaments. Other ideas include bells, candy, bows, faux snow, strings of lights, berries, twigs, or pinecones.

The best part? As I explained in my fall décor post, glass containers easily transition between seasons. Before long I'll be brainstorming springtime fillers!

Monday, December 03, 2012

Make: No-Sew Ruffle Tree Skirt

For the past two Christmases, my make-shift tree skirt has actually been a few swatches of plaid fabric draped around the tree's base. Was this cute? Not really. However, I just couldn't bring myself to settle for an expensive (or cheap but ugly) store-bought skirt, so I draped the fabric and quickly covered it with wrapped gifts. Then last year, immediately after Christmas, I stumbled upon this fantastic tutorial on 
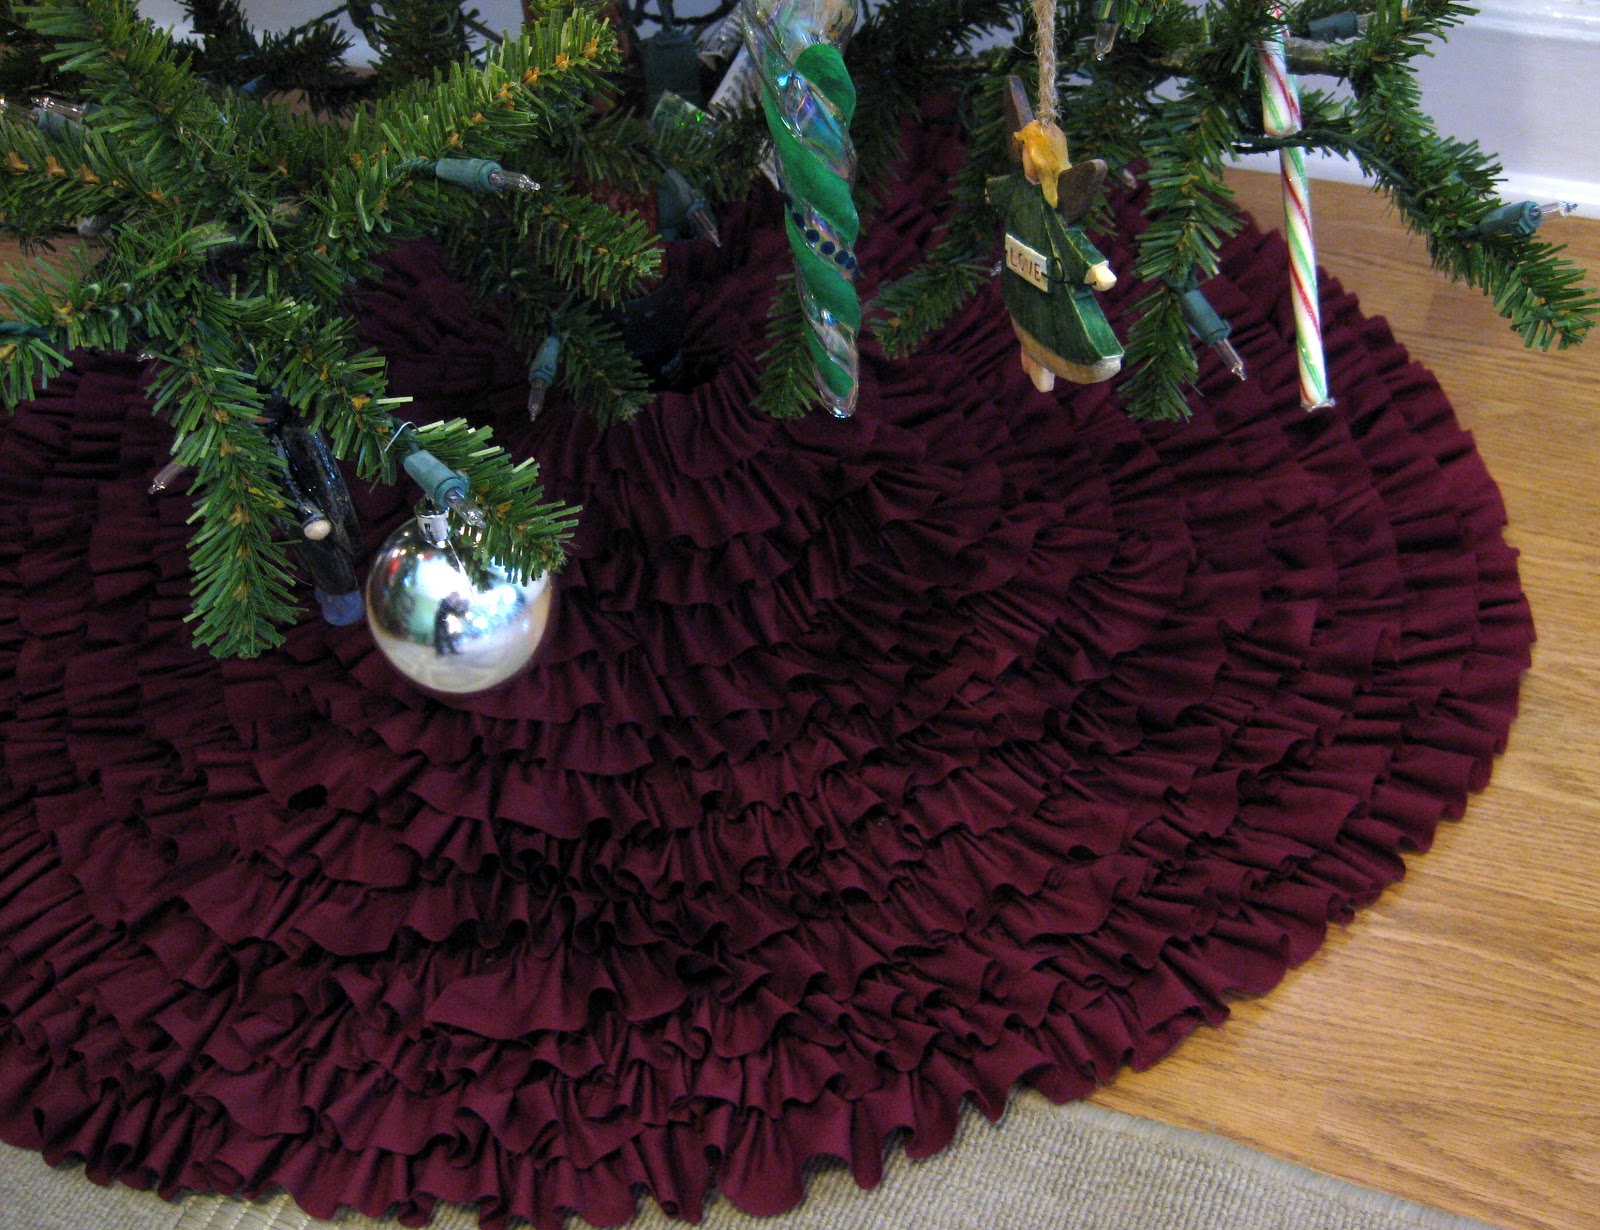
HG-TV for a no-sew ruffle tree skirt. I was positively smitten!


Fitting adjectives for this project: beautiful, sophisticated, easy, time-consuming, and finger-burning.

That last part is thanks to the massive amount of hot glue sticks I used to create this beauty. I was legitimately surprised at how long it took to make this, but I think that could be shortened with two easy steps: 1) use wider strips of fabric and 2) don't be a crazy perfectionist. Remember, it will be under your Christmas tree and admired from afar. That being said, I'm very happy with the final product!

Materials Needed:
Large square of fabric (mine was 3 ½ ft x 3 ½ ft)
4 yards of additional fabric
Measuring tape
Sharp scissors
Hot glue gun
Hot glue sticks

Create Base:
Fold the large square of fabric into quarters. Now cut the outer edge into a quarter circle and cut a much smaller quarter circle out of the remaining point (see photos below). When you unfold it, you should have something reminiscient of a giant donut shape. Cut a straight line from the outer edge to the inner circle (so you can actually wrap the thing around your tree!).


Create Ruffles:
Using fabric shears, cut the remaining fabric lengthwise into 2" wide strips.

With your preheated glue gun, apply a thin line of glue along the edge of the circle--no longer than a few inches. Working quickly (before the glue hardens!), press a strip of fabric on the glue, pinching it as you go. You should have a tiny ruffle before you!

Continue this process around the entire skirt, starting each new row approximately 1 1/2 inches above the previous one (agjust this accordingly if using wider strips). Round and round you'll go till the entire skirt is covered.


And there you have it! Depending on your style, you can make it in one solid color (as I did), complementary colors, fun prints, or (if you're feeling really ambitious) an ombre design with slightly changing shades every few rows.