Showing posts with label vegetarian. Show all posts
Tuesday, July 30, 2013
Eat: Mediterranean Chickpea Salad
Missouri is not known for having the best weather. We seem to jump entirely too quickly from icy cold winters to sweltering humid summers. Lately, though, we have been blessed with strangely mild temperatures. This interim may be short, but it is quite lovely and very welcome. Matt and I try to take full advantage of nice weather with lots of picnics. I'm always keeping my eyes peeled for recipes that are "picnic-ready", meaning I can grab it from the fridge and off we go to a nearby park. You may think this criteria is limiting but not so when you're armed with the handy dandy internet.
I just recently tried this recipe for Mediterranean Chickpea Salad and loved it! I'm up for any dish with feta and this particular concoction displays an appealing variety of colors and textures. Chickpea (or garbanzo bean) salads are a healthier and heartier alternative to pasta salads. An excellent source of protein and fiber, chickpeas are proven to curb hunger and lower LDL (bad) cholesterol. They can also give you an energy boost with their high iron levels -- something I definitely need!
Mediterranean Chickpea Salad
Makes 4 (1-cup) servings
1 (15 oz) can of chickpeas*
1 teaspoon dried parsley
1 cup bell peppers, diced
1/8 cup cup Kalamata olives, sliced
2 oz feta cheese, crumbled
1/8 cup red onion, finely chopped
1/2 cup cucumber, diced
For the Dressing...
1/2 Tablespoon lemon juice
1/2 Tablespoon red wine vinegar
1/4 teaspoon garlic, minced
1 Tablespoon plain low fat yogurt
Salt and pepper (or to taste)
Drain and rinse chickpeas. Place in a large bowl. After you have washed and chopped all of the vegetables, add them to the bowl of chickpeas. Sprinkle with the feta and olives.
In a separate container or bowl, thoroughly mix the dressing ingredients for the dressing. Pour this over the salad and toss to coat. Chill in your fridge for about an hour prior to eating.
*Note: I actually prefer to cook large batches of chickpeas and freeze them in 2 cup bags. It is highly cost effective and takes no time at all -- especially if you have a slow cooker. Here is a helpful overview.
***
I encourage you to find easy recipes that let you get outside and enjoy the nice weather in your neck of the woods!
Wednesday, November 14, 2012
Eat: Roasted Acorn Squash...a Matthew Ritter production
The world is comprised of those who like to cook and those who do not. Of the former, the divide continues further with recipe people and non-recipe people. I fall into the first camp. Matthew falls into the second. I want/need to know exactly how much of exactly what to add exactly when. Matt, on the other hand, is a freewheeling MacGyver in the kitchen. This is the man who added coffee--coffee--to a pot of chili! Grape jelly in stir fry! Soda in barbecue sauce! And do you know what? It works deliciously every time. He is a nice yin to my culinary yang.
All that is to say that this recipe for Stuffed Roasted Acorn Squash is a Matthew Ritter original. The dish is a great combination of fancy presentation and comfort food taste. The ready-made bowls present prettily with their scalloped edges and orange flesh. The acorn squash itself has a smooth texture and subtle nutty flavor. Both of these characteristics areamplified by a filling of walnuts and couscous. Then every few bites you get the unexpected yet complementary tart kick of cranberry. A wonderful mix!
On an unrelated note, I would like to add that I have been very busy lately crafting it up like you wouldn't believe. However, all of my recent projects have been Christmas-themed and I'm afraid that it is just too early to start posting it. The retailers of America would disagree. So get ready for a flurry of fun posts in a few weeks!
Stuffed Roasted Acorn Squash
2 acorn squash
2 tablespoons olive oil
1/2 teaspoon dried sage
2 garlic cloves
2 shallots
3/4 cup water
1/4 cup ginger ale
2/3 cup couscous
1/2 cup walnuts, chopped
1/4-1/3 cup dried cranberries
Begin by cutting the squash in half horizontally and removing the seeds and stems. Pour a small amount of water into a shallow baking pan, just enough to line the bottom. Then place each squash half (cut-side down) into the pan. Roast for 40-45 minutes at 355°F.
Towards the end of roasting time, you should prepare the stuffing. Heat the olive oil in a medium size saucepan and add your sage, garlic, and shallots. After a few minutes, pour in the water and ginger ale. Once boiling, stir in the couscous and remove the pan from heat. The couscous should absorb all liquid. If not, heat additionally as needed. Lastly, stir in the walnuts and dried cranberries
After the squash are roasted, plate each half and fill with stuffing.
***
Want another great fall-time recipe? This week I made Pumpkin Spiced French Toast.
Thursday, October 11, 2012
Eat: Butternut Squash Stuffed Pasta
| While the dish was great, this photo is not. For that, I apologize. |
This delicious dish, Butternut Squash Stuffed Pasta Shells with Thyme Butter Sauce, was the result of an impulse buy. Matt and I had just finished up a brunch date with his mom when we decided to mosey over to the next-door produce stand. I was in need of a pumpkin for the front porch and it offered an impressive selection.
We felt like such hip, locally-conscience urbanites shopping at the little stand that we began roaming the aisle trying to decide what other produce we could plausibly need after a recent trip to the grocery store. We both stopped in front of the butternut squash box and knew we'd found our treasure. Before we made it to the check-out counter, I had already chosen this recipe from my mental list of Pinterest Finds To Try.
The dish had a very long preparation and (honestly) was poorly selected as a workday meal. Fortunately, Matt can tell when I'm getting overwhelmed and the wheels are about to come off. He graciously jumped in, helped out, and by 7pm we were digging in to some extremely tasty pasta. The texture of the filling is smooth and creamy, with a subtle sweetness. Usually after conquering an involved recipe, I rarely think I will repeat it--mainly because I enjoy attempting new recipes. However, this was so good that I fully intend to make it again, although probably as a lasagna for faster assembly.
I modified the original recipe a fair amount, and I strongly suggest you follow my ingredient list!
Butternut Squash Stuffed Pasta Shells with Thyme Butter Sauce
Butternut Squash, peeled and chopped (4 cups)
Jumbo pasta shells (roughly 20, depending on how stuffed you want them to be)
16 oz Ricotta
1/3 cup parmesan cheese
1 garlic clove, minced
½ cup frozen spinach, drained
1 egg
Salt & pepper, to taste
Toss the squash in some olive oil and spread the pieces out in a large baking pan. Roast for 15-20 minutes at 425°F.
Utilize this time to cook the pasta shells according to the package’s directions.
Once the squash has roasted, you should be able to easily smash it with a fork. If not, continue cooking in the oven for a few minutes at a time, checking it regularly. In a large bowl combine the smashed squash, Ricotta, Parmesan, garlic, spinach, egg, salt, and pepper.
Wait until the pasta shells are cool enough to touch, then stuff each with heaping spoonfuls of the filling. This is a great time to call in the family for assistance.
After putting the shells in a greased baking pan, bake for roughly 10 minutes at 350°F.
NOTE: The original recipe calls for 20 minutes at 400°F. Don’t do this! I followed the instructions and regretted it; a few of the pasta shells were overcooked and crunchy. Gross.
To prepare the sauce, melt 1 stick of butter in a small pan, then add thyme to taste. Drizzle this sparingly over the pasta. If desired, sprinkle with additional Parmesan cheese.
Sunday, January 08, 2012
Eat: Healthy Sweet Potato Skins
By now, it is no secret that we love sweet potatoes at my house. It is also no secret that I love to find healthy recipes, too. This week these non-secrets come together with Healthy Sweet Potato Skins. My idea of potato skins usually involves several small potato halves filled with greasy yellow cheese and bacon bits. This recipe from Pinch of Yum shares very little with its traditional counterpart. In my onion, the “skins” are more like twice baked potatoes than anything else. Not that that is a bad thing. The dish features fewer but larger potatoes filled with chickpeas, sautéed spinach and shallots, sour cream, and mozzarella cheese. This delectable, savory dish can function as a lighter meal by itself or a great side to something a bit heavier.
TIME: 1:20 (includes inactive baking time)
YIELDS: 4-6 servings
MY SOUNDTRACK: Bon Iver
1 ½ tablespoons of butter
1 fresh shallot, minced or ½ teaspoon dried
1 bag of fresh spinach
¼ - ½ cup of light sour cream
1 (15oz.) can of chickpeas, drained
shredded mozzarella cheese
salt and pepper to taste
Optional: 2 ounces of neufchâtel (light cream cheese)
1. Begin by baking the potatoes for 60+ minutes at 350°F. You will know they are done when they are tender and can be punctured with a fork. The more tender, the better. It is not a bad idea to do this step ahead of time since you can't know for certain how long it will take for the potatoes to bake.
2. Carefully cut the sweet potatoes in half and let them cool for 5-10 minutes. You can also cut off the hard nubby ends of the potatoes.
3. While the sweet potatoes are cooling, sauté the shallots in butter over medium heat for a few minutes or until translucent. Stir in the fresh spinach and heat for 2-3 minutes, until the spinach has cooked down . I think this is easier to do if you add small handfuls of spinach gradually. Remove the pan from heat and set aside.
4. Using a spoon, scrape the sweet potato out of its peel, leaving a thin shell (around ¼ inch, making sure it can stand up on its own). If the potatoes were thoroughly baked, this step should be a snap. In a large bowl, mix the newly removed sweet potato with the sour cream (and cream cheese, if using). Next, stir in the chickpeas, spinach mixture, salt and pepper.
5. Fill each half with the sweet potato mixture and top with shredded mozzarella cheese. Place in a greased 9x13” pan and bake for 10-15 minutes, or until the cheese is melted.
For crispier texture: prior to filling the potato skins, drizzle each with oil and bake for about 5 minutes.
Sunday, December 18, 2011
Eat: Stuffed Zucchini "Boats"
I guess you could say that this week’s dish was love at first sight. As soon as I saw the photo for this stuffed zucchini recipe, I was hooked. The mix of colors nestled into a perfect little vegetable “boat” was simply too much for me to resist. Plus, my previous foray into stuffed tomatoes turned out so fantastically that I felt as though I was ahead of the cooking game. All in all, this recipe was not particularly challenging; the most difficult part was removing the zucchini halves from their baking dish without destroying them! Given the nature of its ingredients, this dish is best when served right of out the oven. With that in mind, I suggest that you make only what you plan to eat in one sitting. The up side to this was that I used a leftover fresh zucchini as inspiration to bake zucchini bread and muffins!
The recipe that I used (from Kayotic Kitchen) simply suggests “cheese” to sprinkle atop your newly filled zucchini boats. Well, I must to tell you, my friend, that your cheese selection is far more important than that description implies. Although this dish offers much in the way of presentation, texture, and health, its flavor tends toward subtle. The cheese you select will greatly impact the overall taste of the dish. I used blue cheese and recommend it, but other scrumptious options include (yet are not limited to) gorgonzola, feta, parmesan, provel, and provolone. Those are a few that I really enjoy, but the possibilities are expansive. Choose one that you already love or be a little adventurous and try something new!
TOTAL TIME: 40 minutes
YIELDS: 4 servings
MY SOUNDTRACK: Andrew Bird
½ teaspoon of salt
¼ teaspoon of yellow curry powder
½ of a tomato
1 teaspoon of dried thyme
2 zucchinis
1 onion
your choice of cheese (I used blue)
salt & pepper, to taste
Preheat your oven to 400°F.
Begin my preparing the zucchinis. Thoroughly wash and dry them, then slice each in half lengthwise. It is not necessary to cut off the rough ends but remember to not eat them later! Using a regular-sized spoon, scrape out the middle of each zucchini half leaving a ½ inch shell. It should look like a miniature canoe.
Now, chop the newly scooped-out zucchini, onion, and tomato.
Sauté the chopped onion in a dollop of oil for a few minutes; add the curry powder and cook for an additional 30 seconds.
Note: if you allow the onions to cook in curry for too long, the blend will become bitter.
In a large bowl, mix together the onion, thyme, salt, sour cream, zucchini “pulp”, and tomato. You can also add pepper, to taste.
Grease a glass baking dish (whatever size best accommodates the zucchinis; I used a 9 x 13”) and set the zucchini shells in it. Fill each shell with the vegetable blend and sprinkle generous amounts of cheese on top.
Bake the zucchinis for approximately twenty minutes and check their progress. Turn on the oven’s broiler and cook for a few minutes longer or until they are lightly browned.
To garnish, you may use a bit of fresh parsley. You can also cut each zucchini half into smaller portions to serve as a side dish.
Sunday, November 27, 2011
Eat: Kale and Lentil Soup
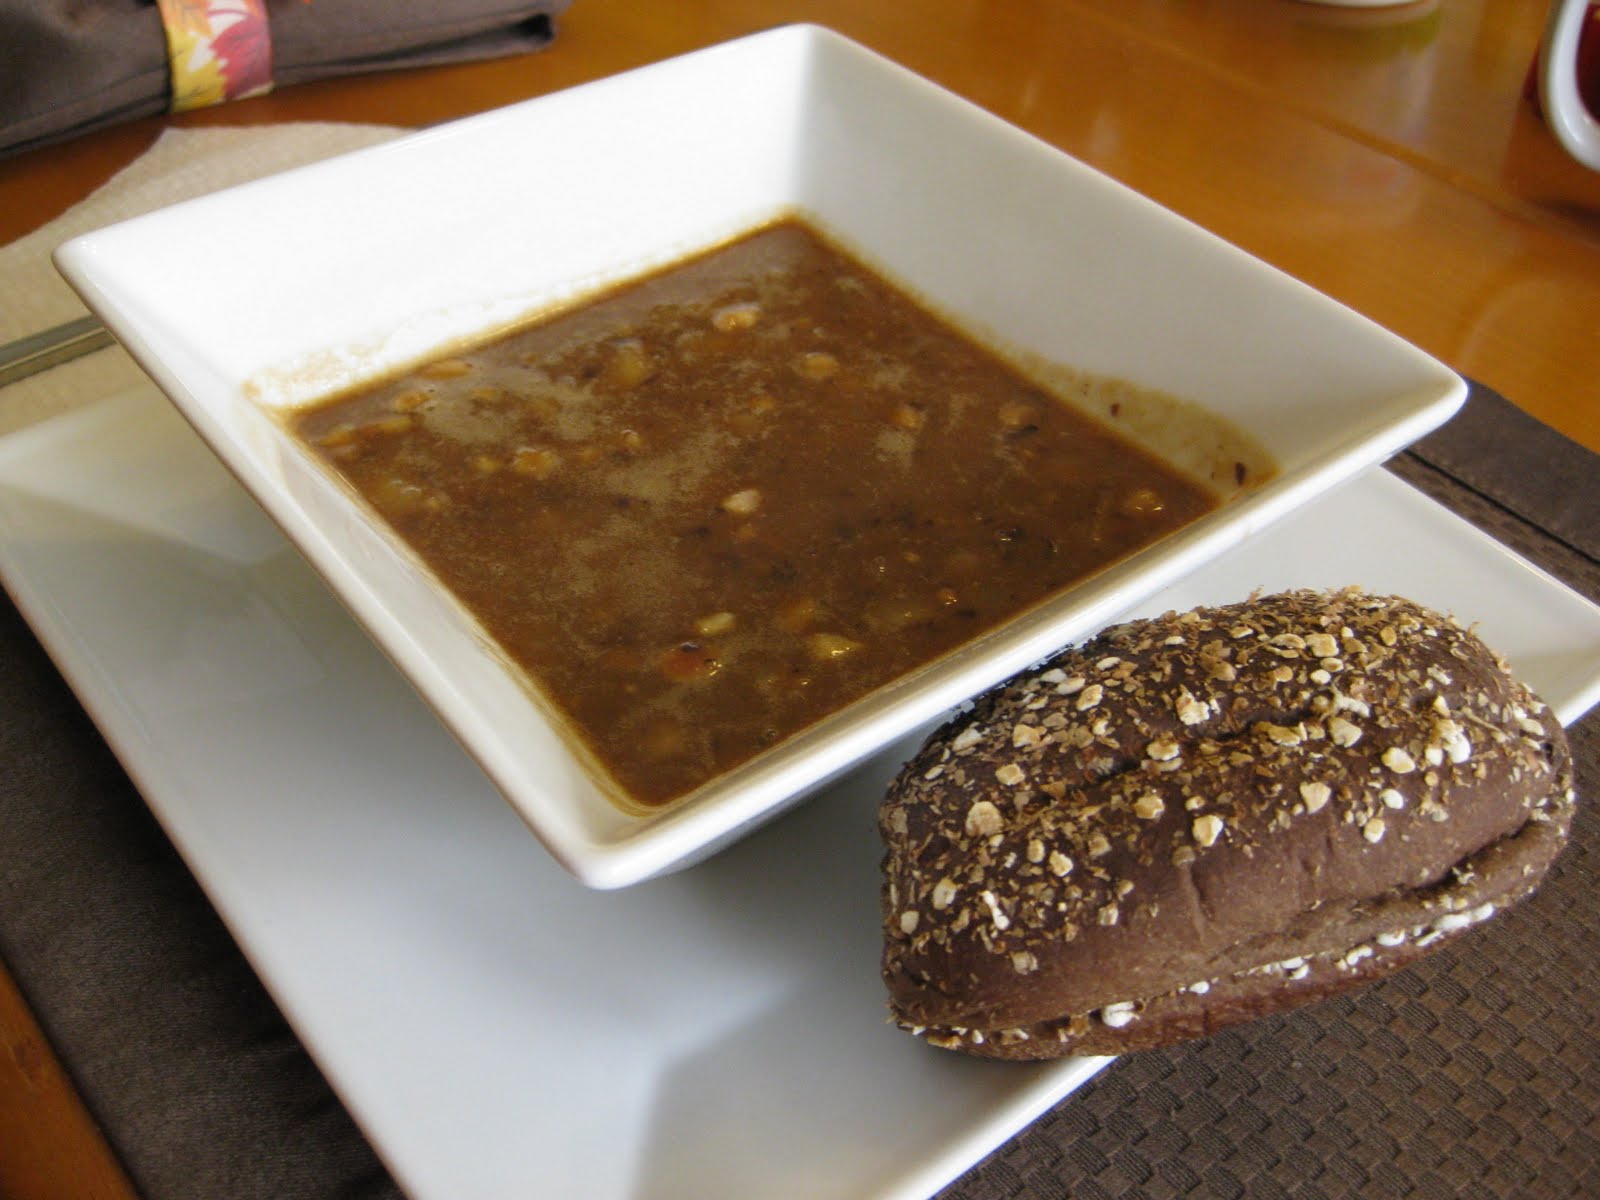
A few weeks ago, my friend Mary sent me a recipe for kale and lentil soup. She said she was surprised at how much she liked it and encouraged me to give it a whirl. I figured if someone enjoyed a dish enough to email me the recipe, it was probably worth my time. I figured correctly. The combination of spices gives this soup a smokey, savory flavor which can be heightened by adding merguez, a spiced North African sausage. Detailed below are multiple ways to modify this recipe to suit your tastes. I stayed fairly consistent with the original recipe from Feast , only substituting a pinch of Cajun spice blend and cayenne pepper in place of paprika.
This recipe also held the appeal of a new ingredient to try: kale. I had never even eaten kale before, much less cooked with it. Kale is a form of cabbage available at most grocers. It has full curly leaves and can be either purple or deep green in color. Kale is a great source of several different vitamins and minerals. It even contains sulforaphane and indole-3-carbinol, chemicals that have strong anti-cancer properties. You have probably encountered kale far more than you realize since it is also used to garnish just about every buffet in existence.
TIME: 1 hour and fifteen minutes
YIELDS: 6-8 servings
MY SOUNDTRACK: The Police
1 onion, chopped
6 cloves of garlic, minced
3-5 celery stalks, chopped
4 carrots, sliced
1 cup of lentils
5 cups of broth
½ teaspoon of cumin
1 teaspoon of Cajun spice blend
dash of cayenne pepper
1 bunch of kale, chopped
1 tablespoon of red curry
salt and pepper, to taste
Once all of your ingredients are prepared (get ready for lots of chopping!), heat the oil over medium heat in a large pot. Add the onion and cook a few minutes or until translucent.
Next add the garlic, celery, and carrots. Cook an additional minute or two.
Add the lentils, broth, cumin, Cajun spice blend, cayenne pepper, kale, and curry. Stir, cover, and and cook on medium/low heat for twenty minutes.
After twenty minutes, stir the soup and season it with salt and pepper. Cook for an additional fifteen to twenty minutes, until the soup begins to thicken and the lentils are tender. If adding meat, do so during this second session of cooking.
Tip: you will likely need to add some extra water to keep the soup from getting too thick. ½-1 cup should suffice. Also, be careful not to overcook the lentils as they may begin to disintegrate.
Serve garnished with reserved celery leaves or curried yogurt (if desired, see below).
Variations:
Add ½ lb of chopped merguez or ham (Mary’s suggestion) to the soup near the end of cooking time.
Top with curried yogurt – ¼ cup of plain yogurt mixed with red curry, to taste.
Sunday, November 20, 2011
Eat: Delicious Veggie Curry
Recently, my husband and I hosted a dinner party with exclusively vegetarian guests. Such ingredient limitations presented a good opportunity to try out a vegetable-based dish. What’s more, I knew that these particular friends were all culinarily open-minded and would enjoy something a bit more exotic. The final result was this week’s recipe, Vegetable Curry. In Western cultures, “curry” tends to be used as a general term for dishes hailing from India, Pakistan, Bangladesh, Sri Lanka, Thailand, or other Southeast Asian areas. A wide range of spices can be used in algorithmic ways to create an array of flavors. This particular recipe features turmeric, cinnamon, cayenne pepper, and yellow curry powder. I think this recipe is a great introductory dish for those who are tepid about curries since the flavor is full but not overpowering. It also has a nice cilantro-yogurt sauce that is a cinch to make and offers a cool creaminess to the meal.
I suppose I should mention that I have historically been quick to identify myself as a carnivore. However, I have gradually been drawn to more and more vegetable-based dishes. If my veggie pursuits continue to turn out as fantastic as this one did, I may find myself roaming the produce section more often.
TIME: 30 minutes prep + 5-6 hours cooking
YIELDS: 6-8 servings
MY SOUNDTRACK: Vampire Weekend
Sauce…
½ cup of fat free plain yogurt
2-3 tablespoons of dried cilantro (or ¼ cup fresh)
1 ½ teaspoons lime or lemon juice
1 of clove garlic, finely chopped
dash of salt
dash of freshly ground black pepper
Mix all of the ingredients together in a small bowl. Refrigerated until served.
Additional garnishes include raisins or sweet chutneys like mango or apricot.
Vegetable Curry…
2 teaspoons of vegetable oil
1 medium onion, chopped
2 cloves of garlic, finely chopped
2 teaspoons of yellow curry powder
½ teaspoon of ground turmeric
¼ teaspoon of ground cinnamon
1/8 teaspoon cayenne pepper
1 medium eggplant, cubed (1”)
2 medium tomatoes, coarsely chopped
1 medium red bell pepper, coarsely chopped
1 cup sliced ( ¼“ ) baby-cut carrots
15oz. can of chickpeas (garbanzo beans), drained
½ teaspoon of salt
¼ teaspoon of pepper
2 cups fresh spinach leaves
2 cups uncooked brown rice or couscous
1. In a large nonstick skillet, heat oil over medium heat. Add the chopped onion and cook for about 5 minutes, stirring occasionally. Once the onion is translucent, add your garlic and cook a few more minutes while continuing to stir. Blend in the curry powder, turmeric, cinnamon and red pepper. Stir the mixture over heat for an additional 30 seconds.
Note: be careful when handling turmeric as it can stain skin, clothing, and even countertops! Unfortunately, I learned this the hard way…
2. Coat a 3-quart slow cooker with butter, oil, or cooking spray. Combine all of the ingredients (including the onion mixture) in the slow cooker, leaving out the spinach and rice.
3. Cover and cook on low setting for 5 to 6 hours. Approximately 5 to 10 minutes before serving, add the spinach to the curry.
4. Prepare the rice or couscous per packaging directions. I made brown rice which took 40 minutes to cook. Stir the curry before serving over a place of rice or couscous; top with sauce.
This week’s recipe can be found on Betty Crocker’s wonderful website!
Sunday, November 13, 2011
Eat: (not your average) Pumpkin Soup
Earlier this week, after narrowing down my recipe choices, I called my husband to ask if he had a preference. The first option: spiced apple cake. The second option: pumpkin soup. Before I could even finish the sentence, Matthew eagerly declared “pumpkin soup!”. Thus began this culinary adventure. I was intrigued by this particular recipe because it includes several ingredients that I had never before seen in pumpkin or squash soup, like pureed black beans, balsamic vinegar, cumin, and shallots. Suffice it to say, this is not your grandmother’s pumpkin soup. What it lacks in appearance (dark brown instead of the soft orange I had imagined), it makes up for in rich and savory flavors. In the end, we both agreed (as did our dinner guests) that this soup does not actually taste like pumpkin at all. However, that does not mean that we didn’t like it. In fact, we loved it!
The original recipe, found in the November 1996 issue of Gourmet, uses Sherry and Sherry vinegar. Since I am not a fancy-pants lady, I did not happen to have either of these on hand. Fortunately, I found there are several alternatives. In place of Sherry, one can use dry white or red wine, vanilla extract (1 tsp for every 2 tbsp), apple cider vinegar, wine vinegars, or even citrus juice. I used apple cider vinegar but would only recommend it if you don’t mind the strong kick of vinegar. Should I make this again, I will try white wine instead. Similarly, in place of Sherry vinegar one can use red wine vinegar, balsamic vinegar, or cider vinegar.
TIME: 1 hour
YIELDS: 9 cups
MY SOUNDTRACK: Steve Martin & the Rare Bird Alert
1 cup of diced tomatoes, drained
1 ¼ cups of chopped onion
½ cup minced shallot (or ¼ cup dried)
4 cloves garlic, minced
1 tablespoon & 2 teaspoons of cumin
1 teaspoon of salt
½ teaspoon of black pepper
½ stick of unsalted butter (1/4 cup)
4 cups of beef or vegetable broth
16oz. can of pureed pumpkin (not pie filling!)
½ cup of apple cider vinegar
3-4 tablespoons of balsamic vinegar
Optional: ½ - 1 pound of cooked ham, diced
1. In a food processor, combine beans and tomatoes. Puree coarsely.
2. Heat a large (at least 6-quart) pot to medium heat. Stir together the butter, onion, shallot, garlic, cumin, salt, and pepper. I added the butter first and let it melt before putting in the other ingredients.
3. Once the onion has softened and begins to brown, stir in the bean-tomato blend. Next add the pumpkin, broth, and apple cider vinegar. Simmer, uncovered, for approximately 25 minutes. Stir the dish occasionally to avoid burning along the bottom of the pot. You can check its progress by dipping a spoon into the pot; the soup should get thick enough to coat the spoon.
4. Before serving, add the balsamic vinegar and ham (if desired) and cook until heated through. You may garnish the dish with sour cream and toasted pumpkin seeds.
2. Heat a large (at least 6-quart) pot to medium heat. Stir together the butter, onion, shallot, garlic, cumin, salt, and pepper. I added the butter first and let it melt before putting in the other ingredients.
3. Once the onion has softened and begins to brown, stir in the bean-tomato blend. Next add the pumpkin, broth, and apple cider vinegar. Simmer, uncovered, for approximately 25 minutes. Stir the dish occasionally to avoid burning along the bottom of the pot. You can check its progress by dipping a spoon into the pot; the soup should get thick enough to coat the spoon.
4. Before serving, add the balsamic vinegar and ham (if desired) and cook until heated through. You may garnish the dish with sour cream and toasted pumpkin seeds.
Sunday, October 23, 2011
Eat: Sweet Potato Cakes with Black Bean Salsa
This week’s recipe for Sweet Potato Cakes with Black Bean Salsa offers a unique blend of flavors and textures. The cakes themselves are subtly sweet and soft with a little kick from green onions. Add to that the cool smoothness of sour cream, zest of lime juice, crunch of raw onion, smack of cilantro, and heat of cayenne peppers. What does all that give you? Quite a culinary experience, that’s what! Preparing the sweet potatoes is the most time consuming aspect of this recipe but the salsa is incredibly easy and quick. So they balance each other out, right?
Although I found this dish while browsing Pinterest, it was adapted from the book Plenty by Yotam Ottolenghi and Jonathan Lovekin. The original recipe has a few variations from my own rendition. For example, I added some extra heat with dried cayenne pepper instead of chipotle in adobe. This was balanced by the sweet onion I utilized in place of the red onion originally prescribed. I say that as though it were part of my grand culinary scheme, but I just wanted to use ingredients that I already had waiting for me in my cupboard. The most important difference to note is that this is actually a recipe for appetizers: little bitty cute potato cakes ready to be displayed on your finest silver platter. Since I knew my husband and I would consume everything ourselves, I opted to save time by making larger (and therefore fewer) cakes with bigger portions of sour cream and salsa. As always, you are welcome to adjust the dish according to your own edible preferences.
TIME: 1 hour
YIELDS: up to 34 cakes (if using smallest portions)
MY SOUNDTRACK: Brahms' cello sonatas
Sweet Potato Cakes…
2 lbs sweet potatoes, peeled and chopped into large chunks
½ cup flour
1 teaspoon salt
½ teaspoon freshly ground black pepper
5 green onions, both white and green parts, finely chopped
4-6 tablespoons oil (I used vegetable, but any kind is fine)
4-6 tablespoons butter
1. Begin by steaming the sweet potato chunks for 15-20 minutes. As odd as this may sound, this was my first time really steaming vegetables without using my microwave or an electric steamer. I'm pleased to report it is a snap. You simply fill a pot with approximately 1 inch of water and then place a "steamer basket" or colander atop the water. Bring to a boil, fill the steamer with your raw vegetables (check to make sure they are not touching the water), and cover. You can check the progress by testing a potato chunk with a fork; if it smooshes easily you are good to go.
Tip: I recommend making the salsa while the potatoes are steaming. You can also prepare the other ingredients for the cakes.
2. Transfer the potatoes to a colander or strainer over the sink and allow to dry thoroughly. Once the sweet potato chunks are cooked and dried, place them in a large mixing bowl. Mash them with a fork or potato masher (if you ever thought to purchase such a thing).
3. Stir in the flour, green onions, salt, and pepper. Resist the urge to use a food processor or else the sweet potato mixture might get gummy. Taste for seasoning and add more salt and pepper if desired.
Note: the mixture should be sticky but not wet; add more flour if needed.
4. In a non-stick skillet, heat two tablespoons of oil and/or two tablespoons of butter over medium-high heat. Form round, flat cakes from about two tablespoons of batter per cake (or more if making larger cakes like I did), and fry four or five at a time for three minutes per side until golden. Transfer finished cakes to a paper towel-lined baking sheet to drain and cool. Add more oil and butter to pan between batches as needed, and continue frying a few cakes at a time until all are ready for their toppings.
Black Bean Salsa…
16 oz. can black beans, rinsed and drained
1-2 dried cayenne peppers, chopped
1 small bell pepper, finely chopped
¼ cup finely minced onion (red or yellow)
¼ cup cilantro leaves, chopped
Juice of 1 lime
¼ teaspoon salt
1. Combine all of the salsa ingredients in a small bowl and stir to combine.
2. Taste for heat and seasoning, adding more peppers and/or salt as desired.
This salsa can be made in advance and stored in the refrigerator.
To assemble…
Place sweet potato cakes on a serving platter and add a small dollop of sour cream to each. Top sour cream with a small spoonful of black bean salsa.
Sunday, October 02, 2011
Eat: Edamame Hummus and Pita Chips
If you read my post from last week, you know that my Fig & Pear Pizza was quite time consuming and laborious. As pendulums are known to do, mine swung in the opposite direction this week. I decided to give myself a break and try something much easier. Although Edamame Hummus may not be challenging it is definitely still unique and delicious! It is a Japanese twist on traditional hummus, a chickpea-based dip common to Middle Eastern and Mediterranean cuisine. A healthy and tasty alternative to your usual dips and salsa, it can be served with raw vegetables, crackers, chips, or my favorite: pita chips! Following the hummus recipe, I will explain how easy it is to make your own pita chips.
Since this recipe features a few ingredients that you may not be familiar with, I think it might be wise to briefly discuss these elements. First up is edamame. Edamame are immature green soy beans originating from Japan. They are generally cooked while still in their pods but do not confuse them with peas. Though similar in appearance, their tastes and textures are totally different. I, for one, do not like peas but love edamame. Their popularity has grown considerably over recent years and they can now be found in almost any grocery store.
Up next is tahini. The first time I made regular hummus, I had no idea what tahini was. I assumed it was some sort of seasoning and wandered the spice aisle of the grocery store like a lost child. Turns out, tahini is actually a paste made from sesame seeds and is used in many Middle Eastern dishes. You are most likely to find it in the foreign food section of your grocer. When I purchased it, my only option was a very large jar that will last me through several (several) recipes.
So now that you know a little more about the ingredients, let's discuss what to do with them.
Edamame Hummus…
TIME: 20-30 minutes (includes time to shell the edamame)
YIELDS: 2-3 cups
¼ cup tahini
¼ cup water
3 tablespoons lemon juice
1 clove garlic, minced
¾ teaspoon salt
½ teaspoon cumin
¼ teaspoon cilantro
2 tablespoons extra-virgin olive oil
Optional: 1 tablespoon fresh parsley (or 1/3 tablespoon dried)
Cook the edamame according to the instructions on the bag. If you are using fresh beans and don’t have any instructions, I suggest you boil them in salted water for 4-5 minutes. Once cooked, remove the beans from their shells. This could take a while.
Combine all of the ingredients except the parsley and oil into a food processor. Puree until well-blended and smooth.
Transfer the mixture to a small bowl. Stir in the oil and parsley.
That’s it!
DIY Pita Chips…
TIME: 10-15 minutes
YIELDS: 30-36 chips
5-6 pieces of pita bread
3 tablespoons of olive oil
1 clove garlic, minced
¼ teaspoon rosemary
Salt, to taste
Preheat the oven to 375° F.
Slice each pita loaf into six wedges.
Combine the oil, garlic, and rosemary in a small bowl. Stir thoroughly.
Brush the oil mixture onto each pita wedge and arrange slices on an ungreased baking sheet.
Bake for ten minutes or until edges start to brown. Note: the more oil you put on the slices, the quicker they will go from nice golden brown to burnt black. So keep an eye on the oven!
These dishes are slight variations of recipes found on the Food Network and Group Recipes.
Labels:
Appetizer,
EAT,
edamame,
hummus,
pita,
pita chips,
vegetarian
Sunday, September 25, 2011
Eat: Fig and Pear Pizza
When it comes to this week’s recipe, I really have to pat myself on the back. My husband described this pear and fig pizza as one of the best dishes I have ever made. I did not come by it easily, though. The pizza features homemade dough and fancy ingredients that were a challenge to find. Were it not for Trader Joe’s, this venture would have been a failure before I ever set foot in the kitchen. Such efforts coupled with two hours of labor were handsomely rewarded in the end. The subtle but sweet flavors of pear, fig, and caramelized onion are balanced by sharp Gorgonzola cheese and crème fraiche. If the following recipe sounds delicious but you aren’t interested in investing so much of your time, you need only to visit Eleven Eleven Mississippi. This dish is readily available on their lunch and dinner menus. It actually presented itself to me in a weekly e-newsletter from Sauce Magazine. It was just too intriguing to not try.
Please note before you begin this recipe that the onions can be prepared up to two days in advance. I recommend doing this to break up such a lengthy preparation time.
TIME: 2 hours (including prep and cooking)
YIELDS: 10-12 servings
MY SOUNDTRACK: Stravinsky
3.5 cups flour
1 cup warm water (100-110°F)
2 tablespoons yeast
2 tablespoons honey
1/4 cup olive oil
1/2 teaspoon salt
4 tablespoons butter
1 sweet onion, thinly sliced
1/2 cup and 1 teaspoon sugar, divided
1 pear, peeled and sliced
1.5 cups red wine
1-2 teaspoons vanilla extract (or 1 vanilla bean)
1/8 teaspoon cinnamon
3 tablespoons crème fraiche (sub: sour cream)
1/2 cup of thinly sliced dried black mission figs
1/2 cup crumbled Gorgonzola cheese
Begin by preheating the oven to 425 degrees.
To prepare the dough, add the yeast to warm water and allow to dissolve.
In a large mixer (preferably with a dough hook) combine the yeast/water blend, flour, honey, olive oil, and 1/2 teaspoon of salt. Run the mixer for 5 minutes (or knead with your hands) until a smooth ball of dough is formed.
Set the dough aside in its bowl, covering the top with a dish towel. If possible, set it somewhere warm. I put the bowl on top of my oven while preheating.
While dough is rising, melt butter in a medium-sized pan. Add the onion slices and 1 teaspoon of sugar. Saute over medium-low heat for roughly 20 minutes, stirring frequently. Once soft and brown, let the slices cool to room temperature.
In a medium-sized sauce pan (or a large skillet), combine the pear, red wine, vanilla, 1/2 cup of sugar, and cinnamon. Bring to a boil and then simmer approximately 20-30 minutes until the pear slices are tender and a bright red-purple color (they will absorb the poaching liquid).
Spread the dough over a pizza pan or cookie sheet. Cover the dough with a thin layer of crème fraiche. Evenly distribute the onion slices, pear slices, and figs across the pizza. Sprinkle with cheese.
Bake for 10-12 minutes and get ready to impress yourself!
Sunday, September 18, 2011
Eat: The Tasty Challenge of Pumpkin Ravioli
For this week’s dish I wanted to up the ante. I began looking for a seriously challenging recipe and boy did I find it! My first impression of this recipe for pumpkin ravioli was that it must be a sweet twist on traditionally savory ravlioi. This was due to all of my previous interactions with pumpkin dishes: pumpkin pie, pumpkin bread, even pumpkin cookies. However, I quickly learned that pumpkin in its purest form is not even remotely sweet. In fact, as far as I could tell (or rather, taste) it does not taste like much of anything by itself.
An interesting aspect of this recipe is the use of wonton wrappers in place of pasta. The upside to this is the drastically shortened preparation time. Wonton wrappers function like ready-made pasta without any cooking. The downside to this trick is that after putting so much effort into making perfect little pockets of cheese, many of them opened up while boiling. So if you give this dish a try, be emotionally prepared to watch some of the fruits of your labor burst open. Otherwise, it was a fun challenge with tasty results! I particularly enjoyed the tomato and ginger sauce, which would also pair well with traditional pasta.
TIME: 1.5 hours
YEILDS: 6-8 servings
MY SOUNDTRACK: She & Him, Mates of State
Ravioli...
1 teaspoon oil
4 oz. onion, finely chopped
2 cloves garlic, minced
15 oz. pumpkin puree (NOT pumpkin pie filling)
15 oz. ricotta cheese
2 egg (1 will act as "glue" for ravioli)
1/2 teaspoon salt
freshly ground pepper, to taste
12 oz. (approximately 50) wonton wrappers
cornstarch for dusting pan
Begin by heating oil in a small skillet. Sauté the onion and garlic for a few minutes until softened.
In a large bowl, beat one of the eggs with salt and pepper. Stir in the pumpkin and ricotta cheese. Add the onion and garlic mixture. Blend thoroughly, scrapping the sides and bottom of the bowl.
To make the ravioli: Prepare two baking sheets by dusting them with the cornstarch. Put one teaspoon of filling in the middle of a wonton wrapper (which is fairly delicate, so handle gently gentle). Dip your index fingers into a beaten egg and line the edges of the wrapper. Fold diagonally into a triangle and press the edges firmly to seal the pocket. Place on baking sheet. Repeat for each wonton wrapper.
To cook: Bring a large port of water to a boil. Add a few teaspoons of water to prevent the ravioli from sticking together. Gently add each ravioli to the pot and bring the water back to a boil for a few minutes.
To serve: This is where things can get a little dicey. If some of the ravioli have opened while cooking, I would not recommend draining the water. All of the filling will escape into the sink leaving you with a pile of plain cooked pasta. Instead, remove the ravioli from the pot using a slatted spoon. You can then spoon out any of the filling in the pot and add it to your plated pasta. Top with tomato ginger sauce (see recipe below).
Tomato Ginger Sauce...
1 tablespoon oil
6 oz. onion, finely chopped
2 cloves garlic, minced
1 tablespoon of fresh ginger or 1-2 teaspoons of dried
½ teaspoon salt
Freshly ground pepper, to taste
28 oz. can of diced tomatoes, with juice (do not drain!)
In a medium saucepan or skillet, heat oil. Cook the onion and garlic until tender. Add the ginger and tomatoes. Bring to a boil briefly and simmer for 10-15 minutes. If it is too thick, you can add a pinch of water. For a smoother texture, puree the sauce.
This week's recipe came from my husband's own collection. Unfortunately, he cannot recall where he originally found it.
Sunday, September 11, 2011
Eat: Yummy Stuffed Tomatoes!
Wow. That is the best word to describe this recipe for veggie-stuffed tomatoes. At first blush, it may present as too labor intensive, but it was actually quite fun! In fact, I managed to throw this dish together at the end of a busy and tiring day. I was faced with the usual quandary of what to make for dinner and resolved to find something to do with two ripe tomatoes that my father-in-law had recently given us. After a series of online searches for "recipe, two tomatoes", I stumbled upon this gem. The recipe blends a plethora of healthy ingredients into a savory and delicious meal. What's more, it presents beautifully on top of a plate of pasta. My husband was very impressed and we both loved it. This dish combines interesting textures and offers a unique alternative to traditional pasta sauce. I definitely plan to make it again soon!
TIME: 40 minutes (prep and cooking)
YIELDS: 2 servings
MY SOUNDTRACK: NPR, St. Vincent
3-4 baby carrots, coarsely chopped (or 1/2 small carrot)
1-2 scallions, chopped
1/2 small onion, peeled
1 small garlic clove
1/4 teaspoon dried oregano
2 teaspoons olive oil
1 tablespoon white wine or broth
1/3 cup dry bread crumbs
2 tablespoons grated Parmesan
3-4 fresh basil leaves, sliced
Optional: a few handfuls of pasta, oil, and additional Parmesan.
Begin by thinly cutting off the top of each tomato (approximately 1/2" slices). Scrape out the interior, leaving a 1/4 to 1/2" thick shell. Set aside the pulp for later.
If either tomato won't stand upright, slice off a very thin layer from the bottom. Sit the newly carved tomatoes upside down on a paper towel to drain any excess fluid.
Combine the carrots, scallions, onion, garlic and reserved pulp in a food processor. Run the processor until all of the ingredients are chopped and well blended.
Pour the vegetable mixture (it will be somewhat soupy) into a large skillet with heated oil. After a few minutes, add the wine or broth and bring to a boil. Allow the mix to simmer (uncovered) for 2+ minutes until the liquid is reduced by half. If the blend still seems to have too much liquid, do not worry. The soon to be added cheese and breadcrumbs will take care of it.
Remove the skillet from heat and let it cool briefly. Stir in the parmesan cheese, breadcrumbs, oregano, and basil.
Now the fun part! Using a small spoon, fill each tomato with the veggie blend.
Place the tomatoes in a shallow baking dish (coated with butter or cooking spray). Bake for 20 minutes at 350°.
While the tomatoes are baking, you can cook as much pasta as you like. I used spaghetti but any type should work well enough. Toss the cooked pasta with some oil and a pinch of grated Parmesan cheese. Place each tomato on top of a stack of plated pasta.
Note: Removing the tomatoes from their baking dish may require some fancy maneuvering with a fork. The tomatoes may split open (as one of mine did) which will make the process a bit more delicate.
Enjoy!
This week's recipe came courtesy of Taste of Home .
Sunday, September 04, 2011
Eat: Maiden Voyage with Tofu
Mexican Eggplant with Tofu. As soon as I spotted this recipe I knew my husband would love it. The name alone features three things that Matt adores. I also thought it presented a nice challenge since I had never before cooked with tofu.
This marked my second attempt at a Zorba Paster recipe. In case you are unfamiliar, Paster is a physician and the host of WPR’s Zorba Paster on Your Health. Quick synopsis: listeners call in to ask a plethora of questions which Zorba answers in humor-laced laymen terms. He also offers a healthy, unique recipe at the end of each show. For all of you St. Louisans, the show airs on Sundays at 1:00pm. I love public radio and take any opportunity I can to endorse it! This recipe and others like it can be found on Zorba Paster's website
But I digress. Here is the recipe:
TIME: 1 hour (including prep and baking)
YIELDS: 9 servings
MY SOUNDTRACK: Devendra Banhart, TRON movie soundtrack (this odd combination came courtesy of my husband)
1 large eggplant
1 carton of tofu*
12 oz. tomato sauce
1 can of green chilies (alternatives: fresh onion or serrano chilies)
¼ cup scallions, sliced
1 tsp garlic powder
1 ½ tsp cumin
2 tsp olive or vegetable oil
8 oz. cheddar cheese, shredded
Cooking spray (or butter)
Right off the bat, one thing struck me as problematic: How much tofu?! The original recipe simply says a "carton" which can come in every shape and size. Fotunately, the grocery store only offered one amount (14oz.). Unfortunately, upon entry to the organic food aisle I found myself staring a shelf of several different kinds of tofu. I was at a loss and spent several minutes hemming and hawing. In the end, my moderate roots won the day and I selected the carton marked "regular". I cannot say whether or not this was the best choice but I can tell you that it worked well enough.
Begin by slicing the tofu (it will be in a large block) into half-inch pieces or slabs. Place the slices in between a few sheets of paper towel on your countertop. In order to drain the excess fluid, put something large and heavy on top (such as a cutting board).
Slice the eggplant into half-inch rounds. Arrange slices on a coated cookie sheet and bake at 450° for 20 minutes (flipping pieces after 10 minutes).
While eggplant is baking, combine tomato sauce, scallions, green chilies, garlic powder, and cumin into a sauce pan. Simmer for 20 minutes.
To further strengthen your multi-tasking skills, saute the tofu in oiled skillet while the sauce is simmering.
Once everything is ready, coat a 9x13 inch baking dish with cooking spray or butter. Layer the eggplant, tofu, sauce and cheese. Repeat for a second layer.
Bake for 30 minutes at 350° and enjoy with a side of brown rice!
*As mentioned, I used one 14 oz. carton but I would recommend at least twice that amount.
Subscribe to:
Posts (Atom)